Likewise, the app data of previously installed programs and software, as well as the user account’s settings files could also be found there. So if you ever plan on downgrading your PC to the earlier OS version, then this folder could come in handy. Moreover, if an app isn’t behaving along the expected lines, then you could pick up its settings from that backed-up folder and configure it accordingly on your new OS. But if there’s no intention for you to downgrade to the previous build and all the apps and software are working along the expected lines, then it’s best to delete these windows.old folder right away.
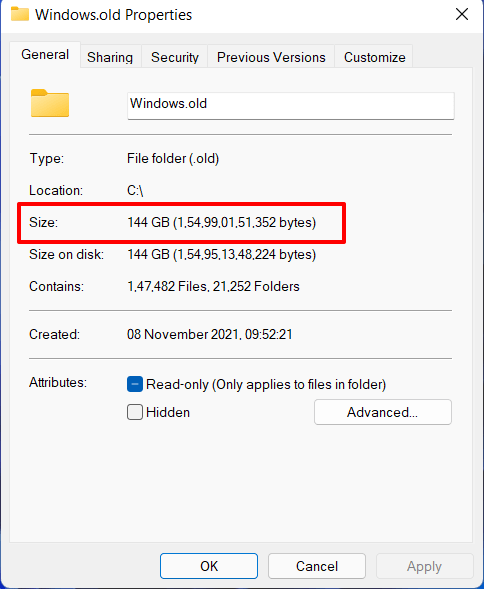
The reason for the same is the astronomical amount of unnecessary storage space that it ends up consuming. Generally, you might find this number to be around 20-30GB, but in some instances (of which I’m a part), this figure could soar up to around 150GB! So allocating such a huge amount of storage to a backup folder of which we have no intention of using in the near future doesn’t make much sense. If you also echo this thought, then this guide is here to help you out. In this tutorial, we will show you various methods through which you could delete the windows.old folder in Windows 11. Follow along.
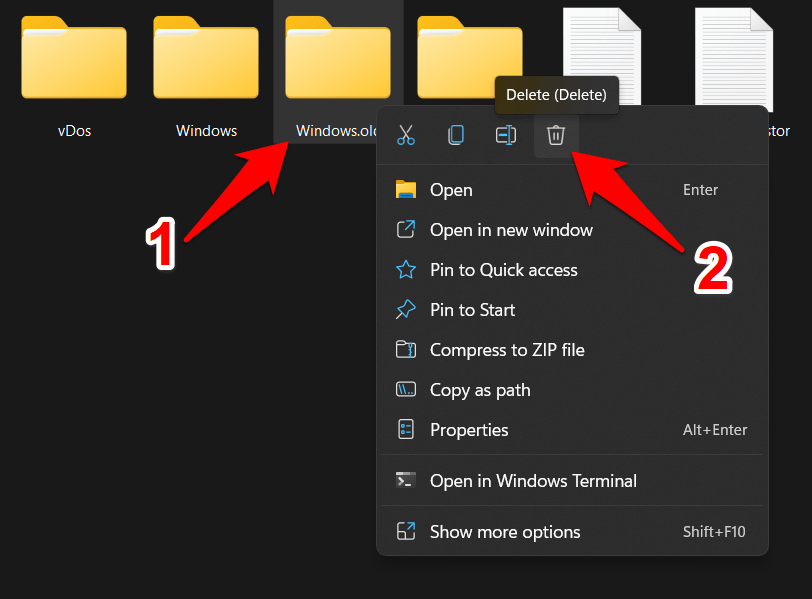
Method 1: From File Explorer
This is the shortest and most straightforward approach when it comes to deleting the windows.old folder in Windows 11. Here’s what you need to do:
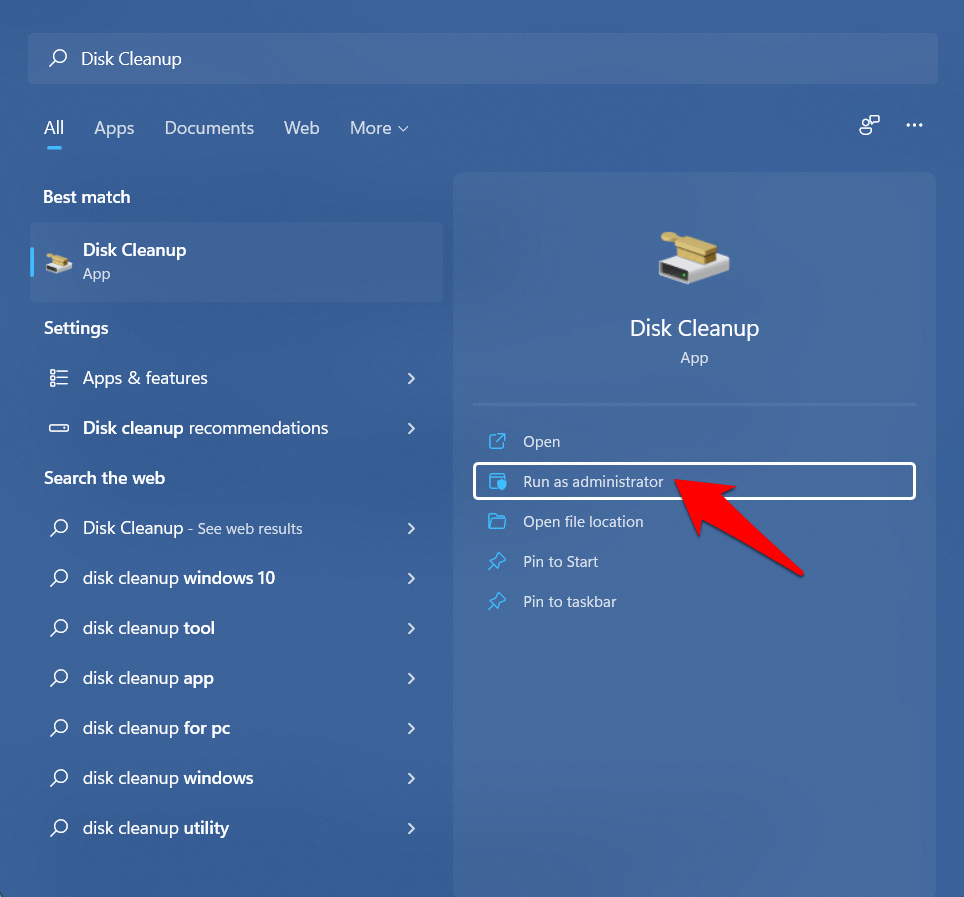
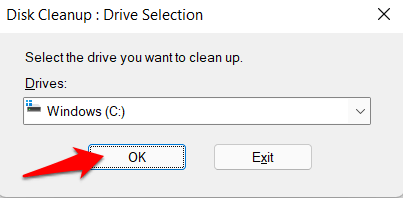
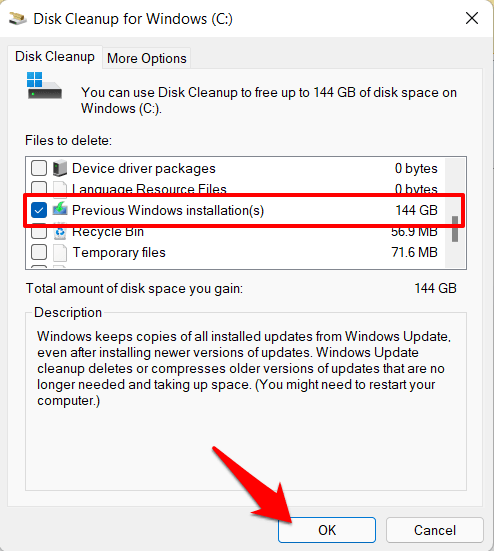
Method 2: Using Disk Cleanup
You could also make use of the built-in Disk Cleanup tool to delete the windows.old folder in Windows 11. Here’s how:
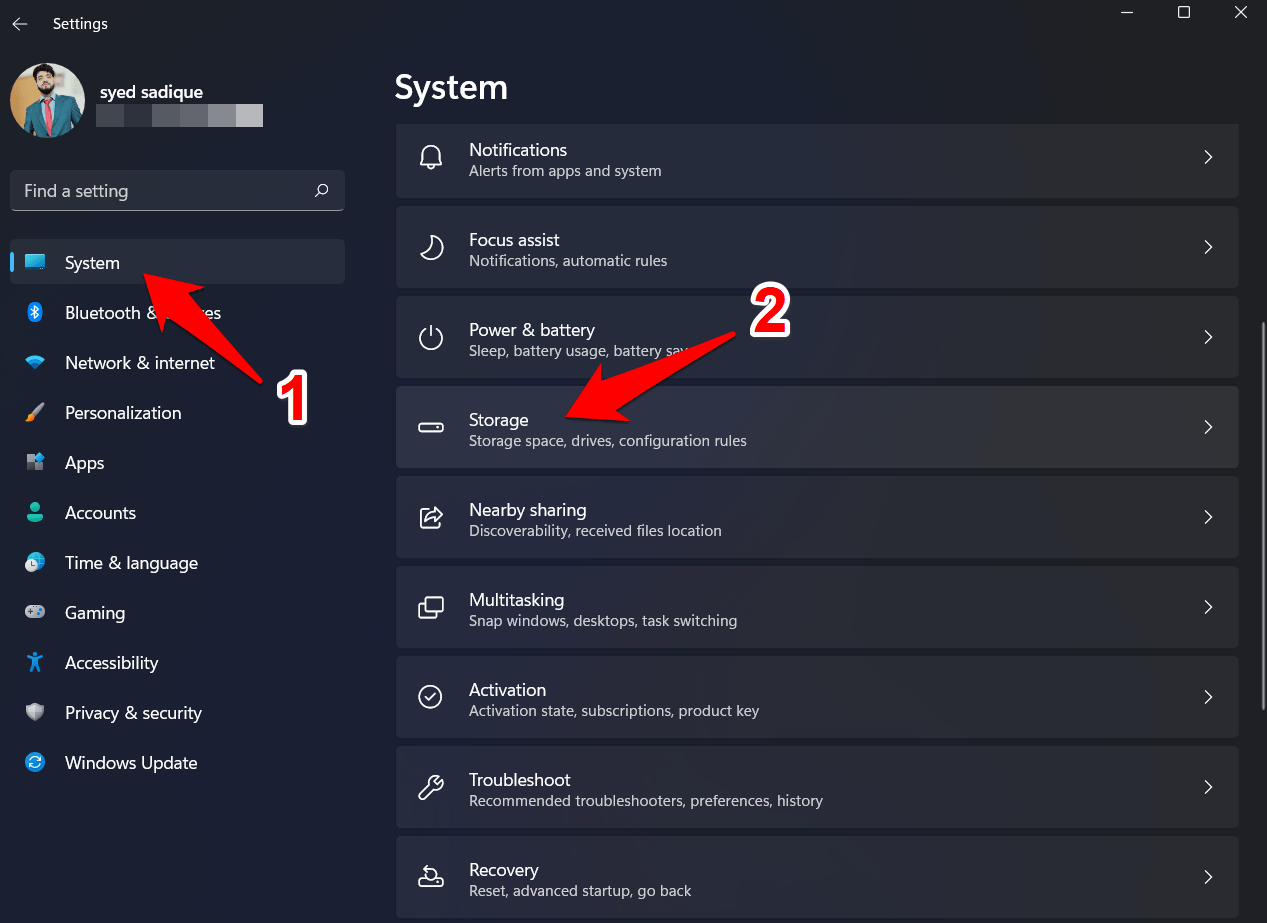
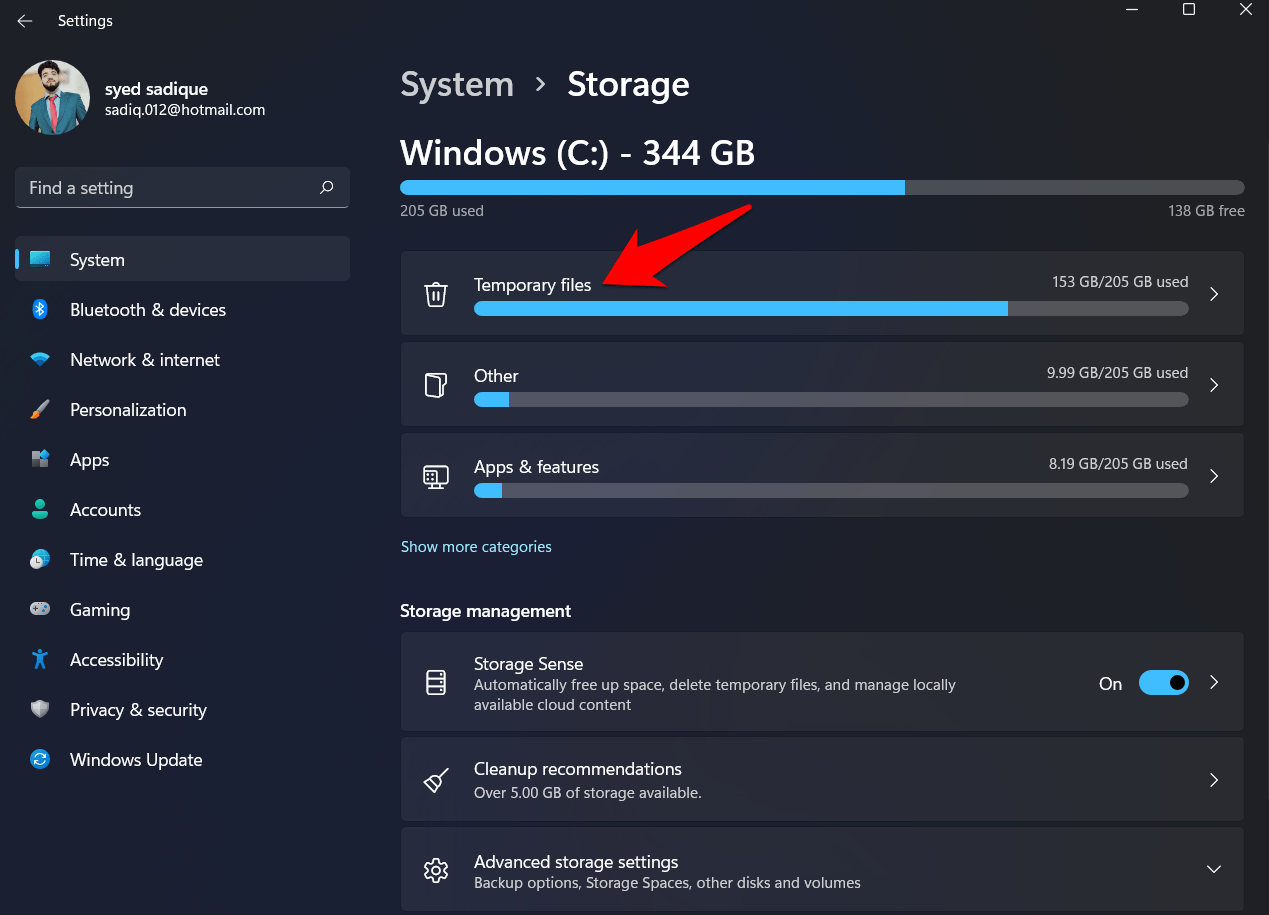
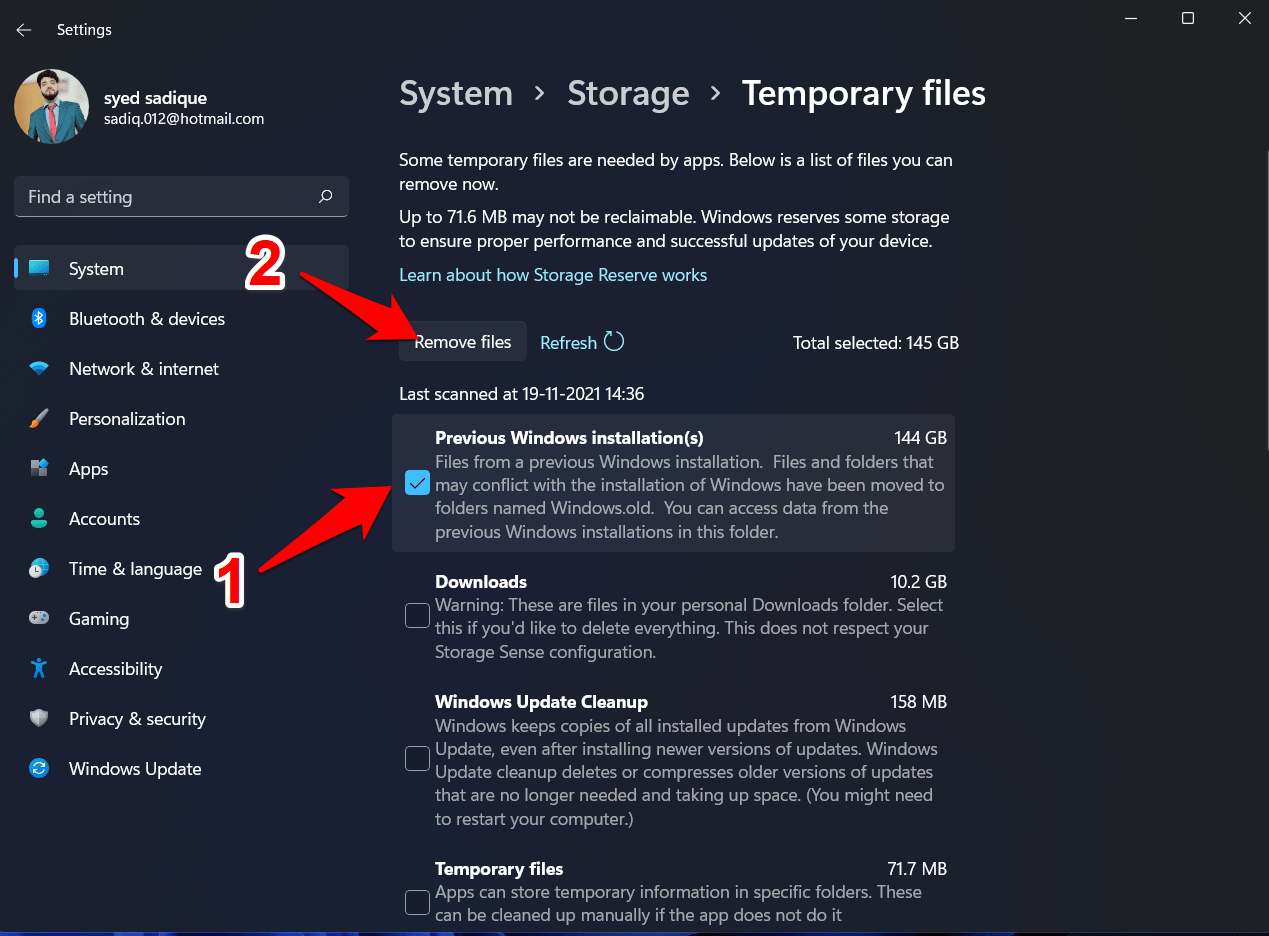
Method 3: Via Temporary files
Windows keep a track of all the temporary files stored on your PC, which includes the files and folders of the previous OS build as well. So using this functionality, we could delete the windows.old folder in Windows 11 as well. Follow along for the instructions:
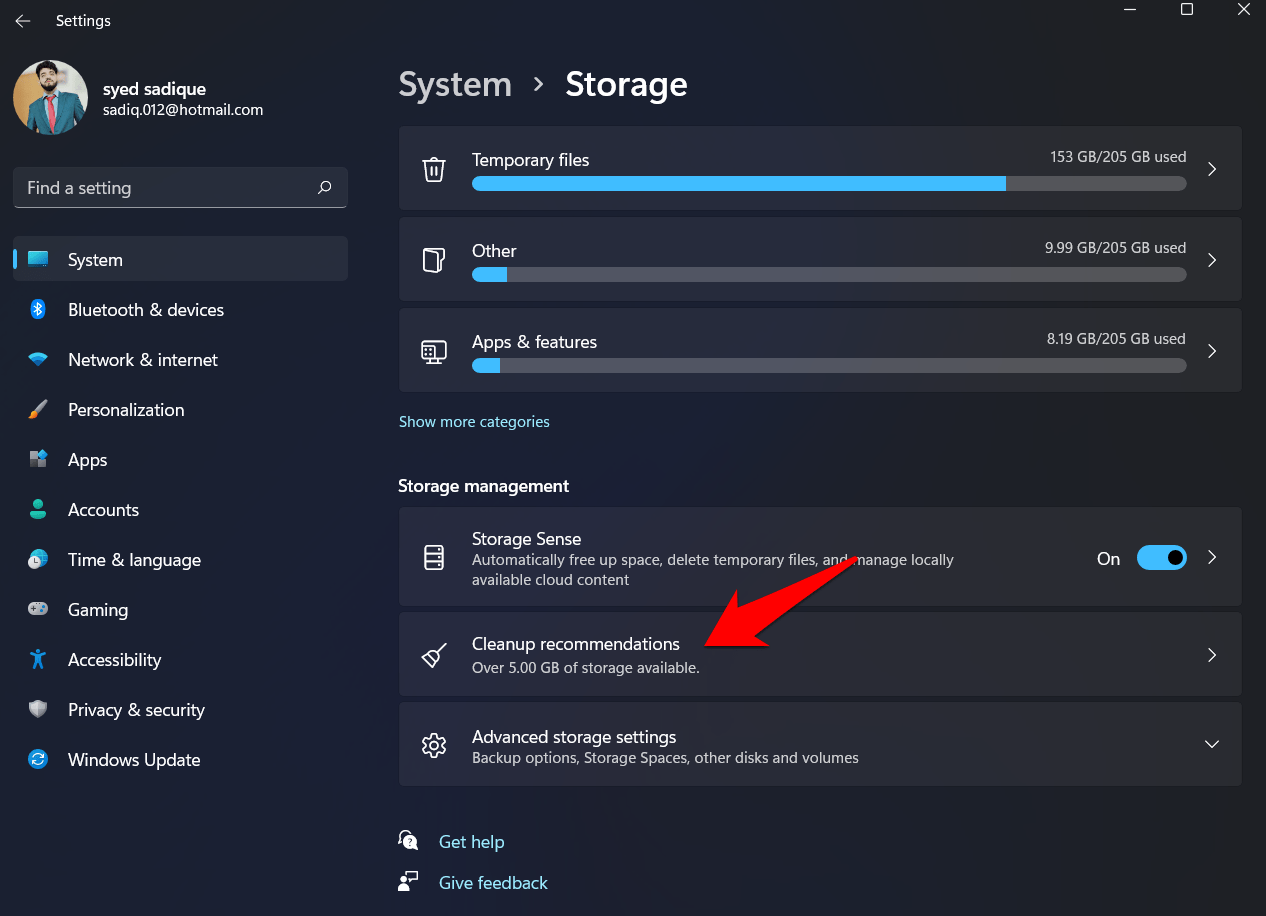
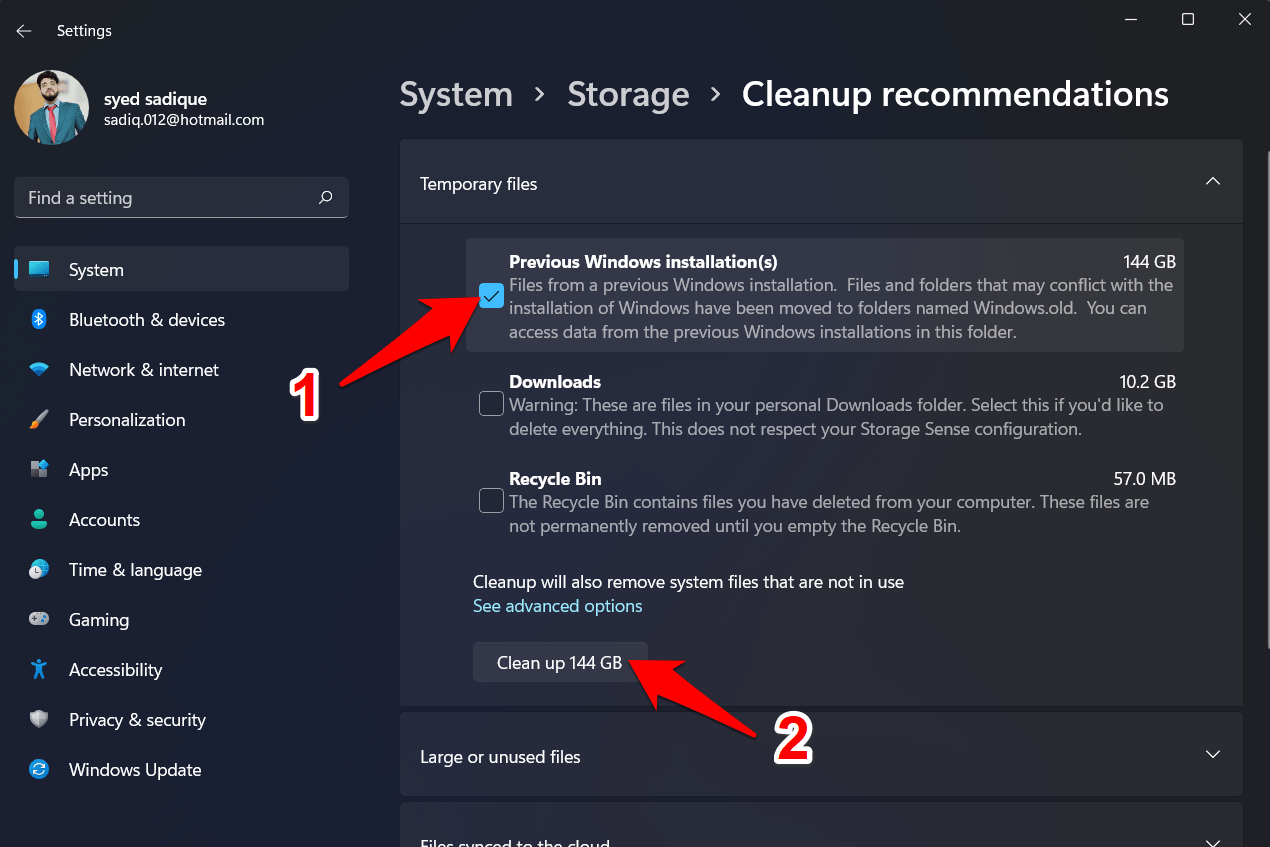
Method 4: Cleanup recommendations
Windows recommends files and folders that you could safely remove from your PC in order to free up storage space. And as of now, we would use this feature to delete the windows.old folder in Windows 11.
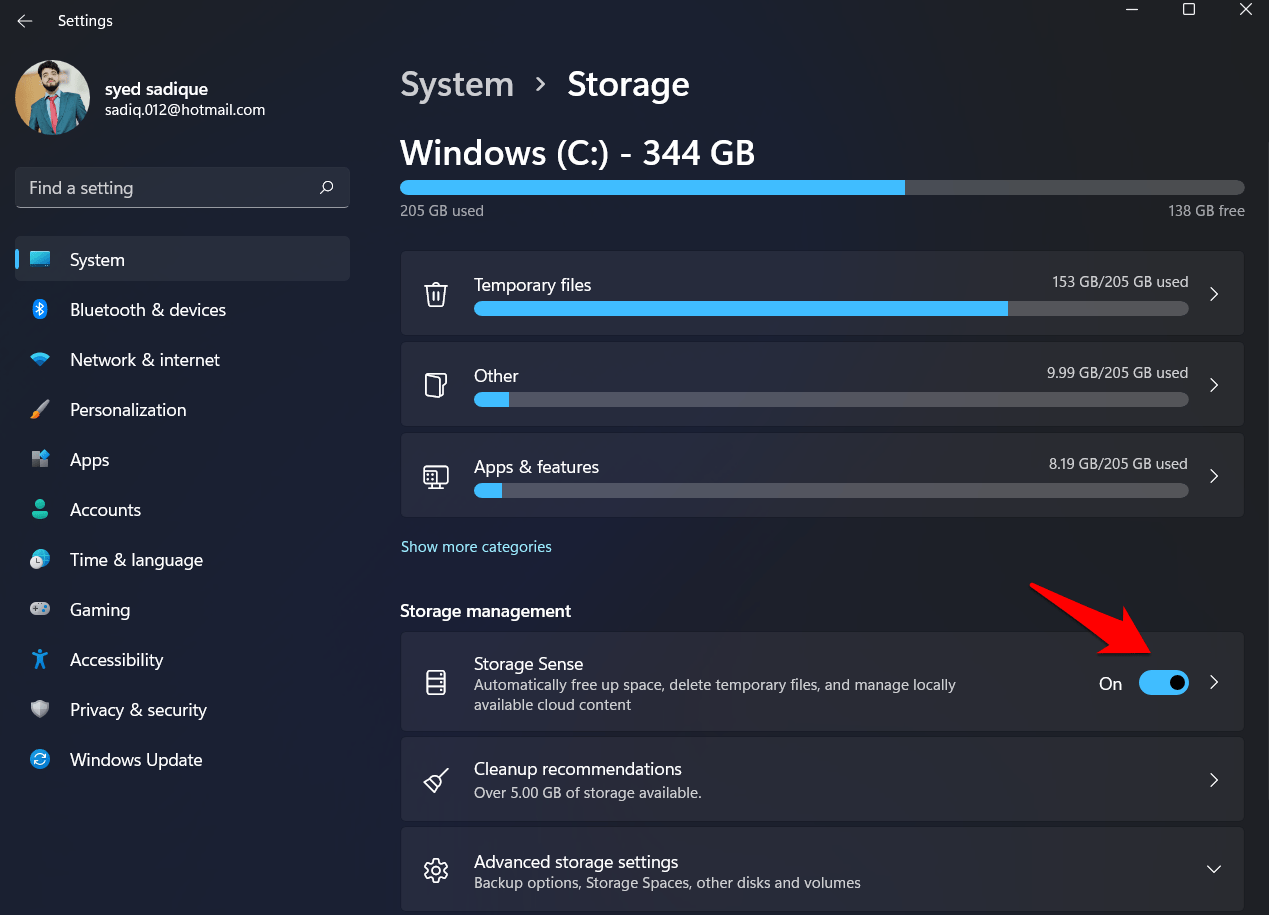
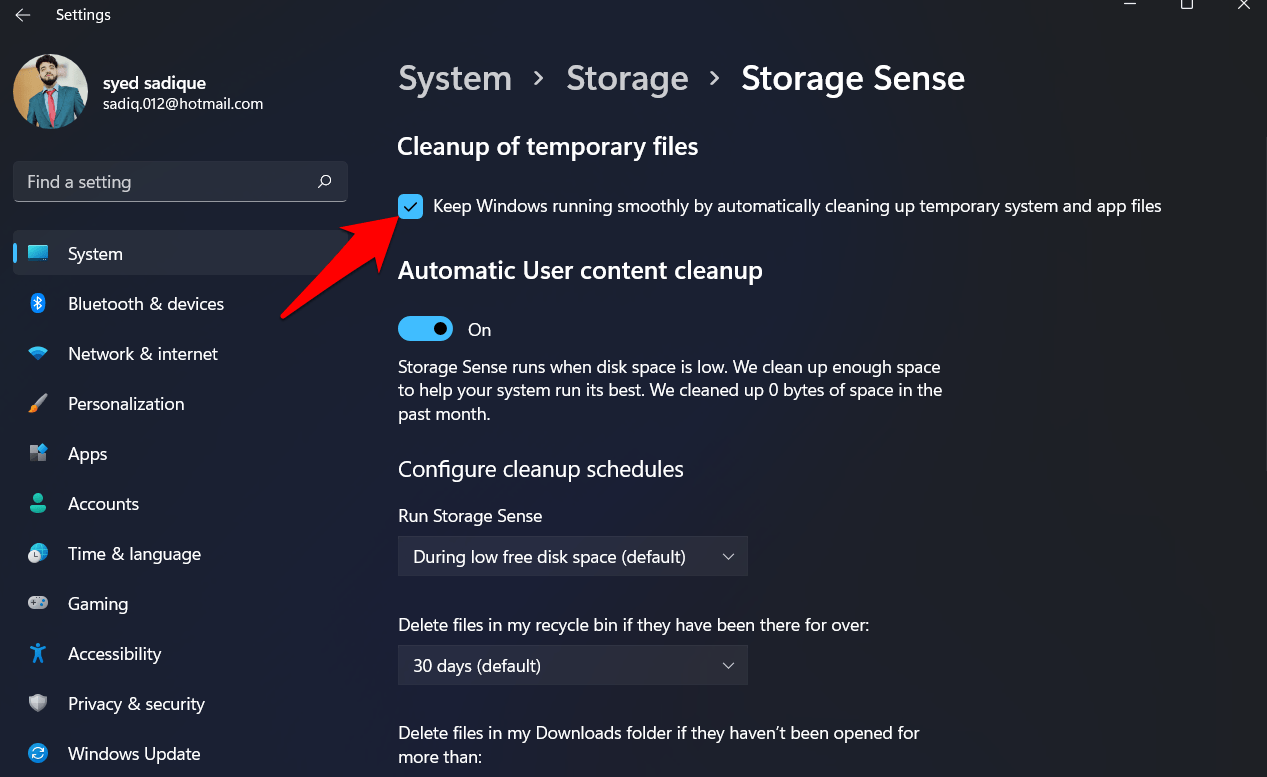
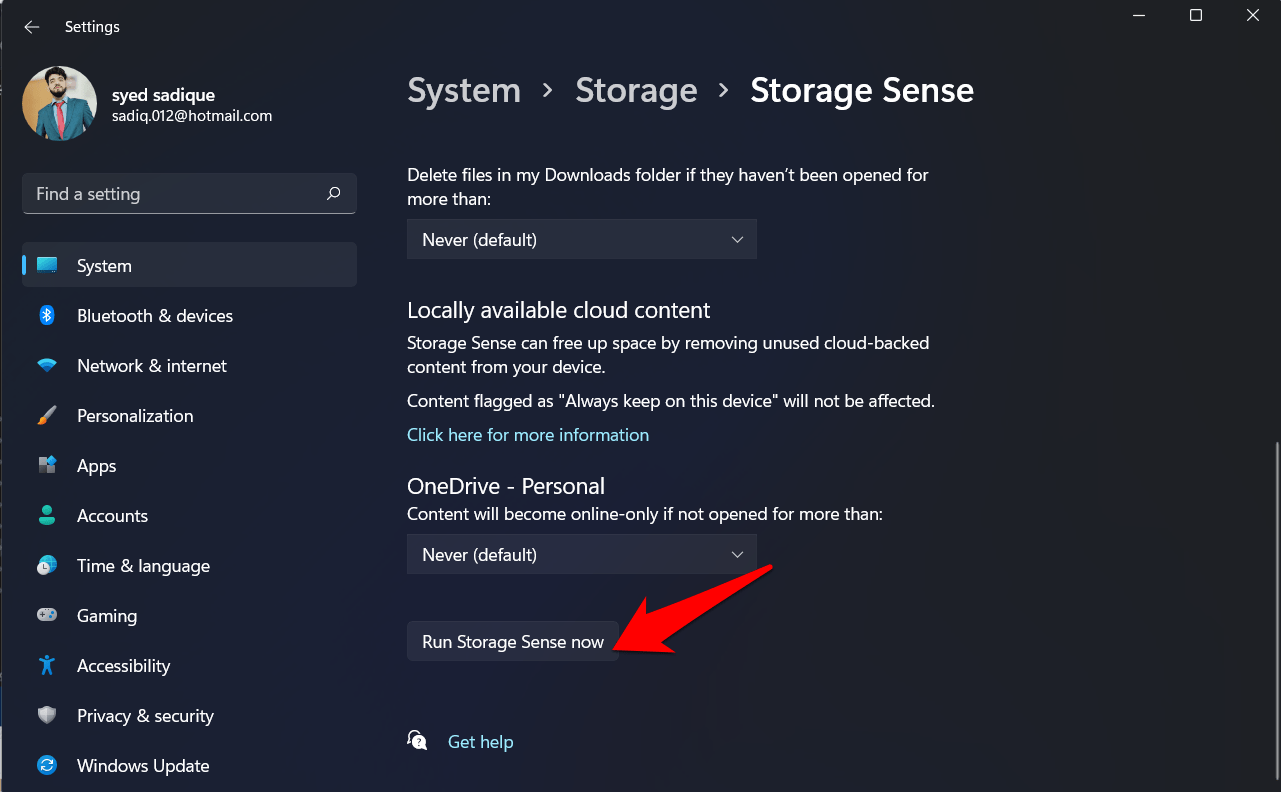
Method 5: Via Storage Sense
Storage Sense is the built-in utility tool that could be used to automatically delete the temporary files and folders at regular intervals. Along the same lines, you could also configure various cleanup schedules or delete the locally available cloud’s contents. Moreover, it could also come in handy if you wish to delete the windows.old folder in Windows 11. Here’s how:
Conclusion
With this, we round off the guide on how you could delete the windows.old folder in Windows 11. We have shared five different methods for the same. If you have any queries concerning the aforementioned instructions, do let us know in the comments section below. If you’ve any thoughts on How to Delete the windows.old Folder in Windows 11, then feel free to drop in below comment box. Also, please subscribe to our DigitBin YouTube channel for videos tutorials. Cheers!
[Fixed] Microphone Not Working Issue on Windows 11 Photos Not Showing Thumbnail in Windows 11: How to Fix How to Fix HIDCLASS.sys Blue Screen Error on Windows 11/10?
Comment * Name * Email *
